Node Editor for ParaView
As computational power grows stronger, pipelines also grow more complex : being able to understand a workflow and change it easily can become a real challenge. A few decades ago software such as Blender introduced a new way of visualizing and editing such complex pipeline : the node editor. This type of workflow is now broadly used and praised by users across several software, and has been recently introduced into ParaView :
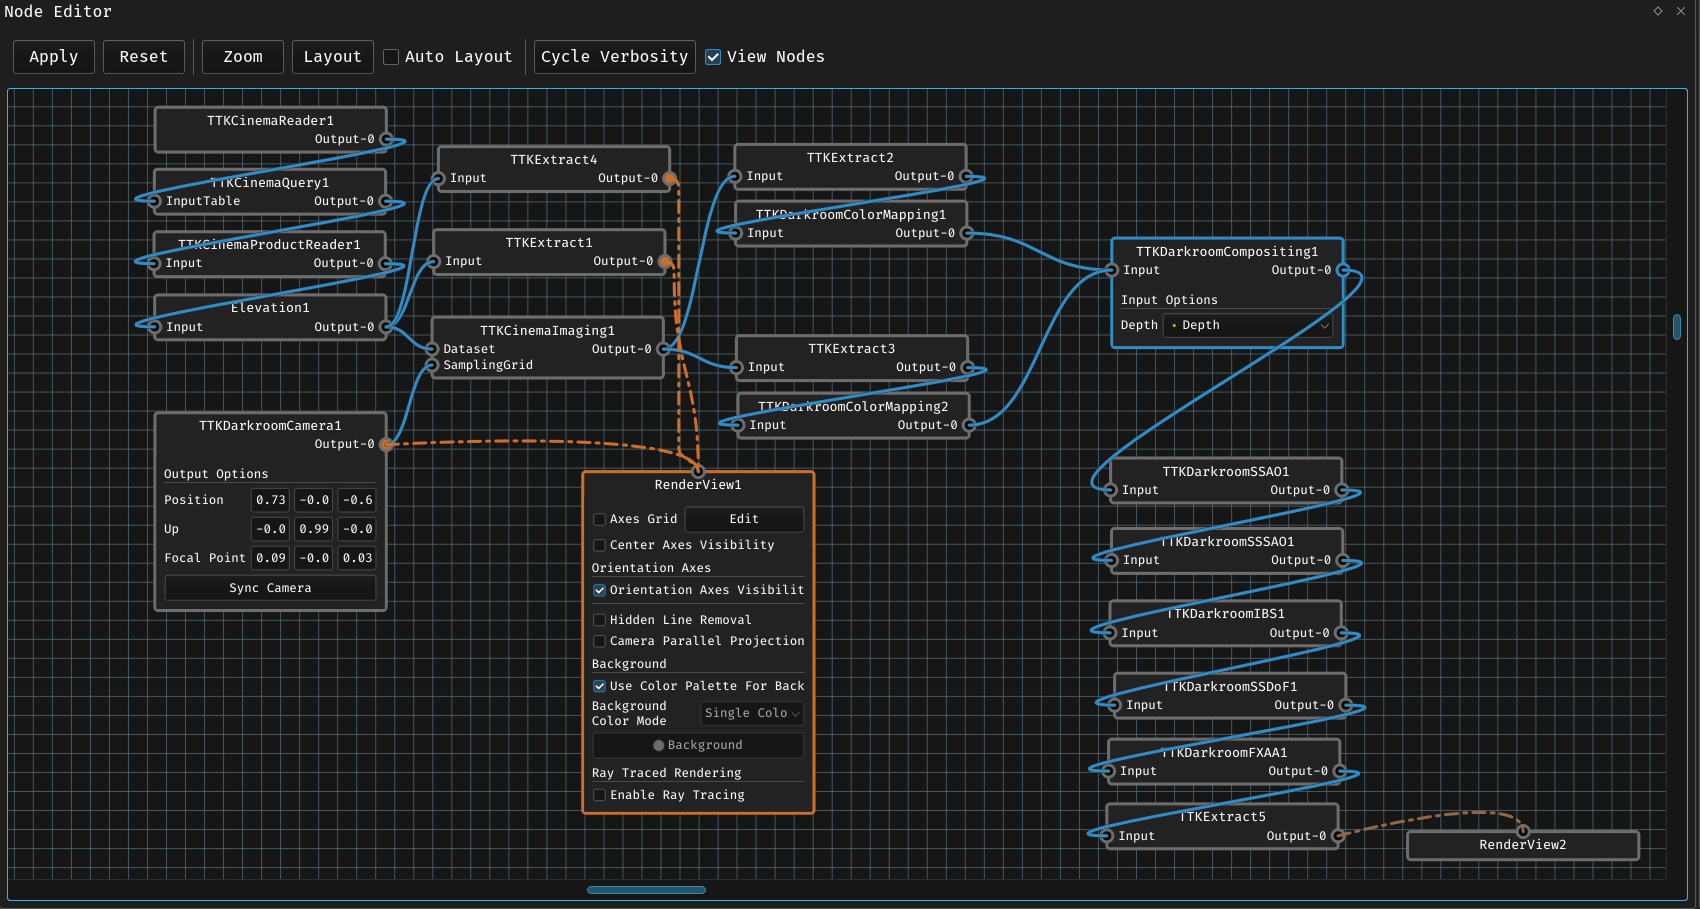
If you want to know more about TTK and how to use such pipeline, check out this blog post.
What you can find in the ParaView node editor
Let’s discover the node editor through the following simple pipeline :
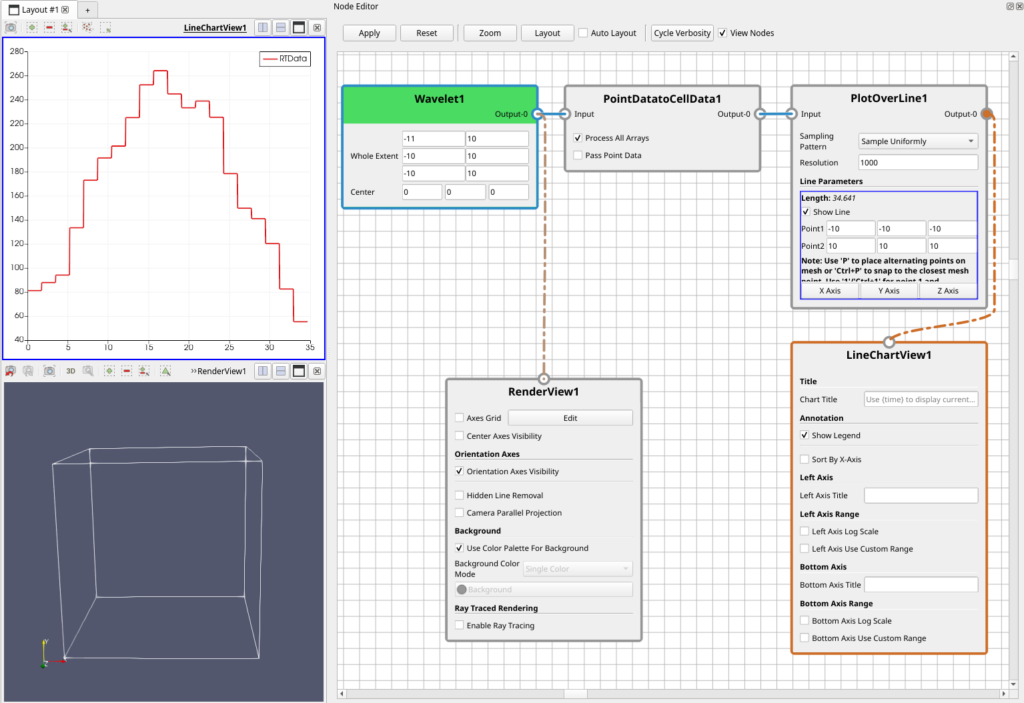
In this pipeline we create a Wavelet that we visualize in a Render View and we plot its data along a line in a Line Chart View. The active source is highlighted with a blue border while the active view is highlighted with a orange border. Note that multiple sources can be selected at the same time, just as in the pipeline browser. Edges between sources are represented in blue, while visibility of an output port in a view is represented as orange edges. Also note that if one does not want the view nodes and visibility edges to appear it is possible to hide them by unchecking the “View Nodes” check box in the tool bar just above.
Another thing to notice is that Wavelet1 is highlighted with light green : this means that the source has been changed but not applied yet.
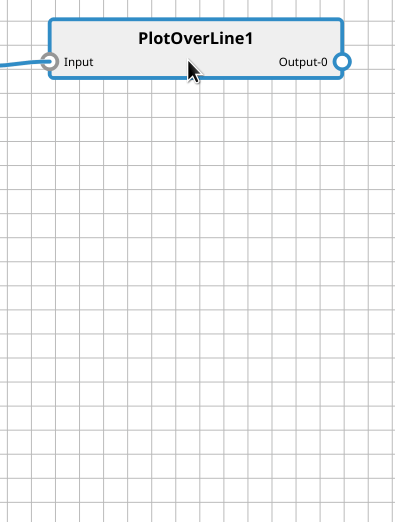
To allow a nicer display when working with huge pipeline, it is possible to change the verbosity level of a node by right-clicking its label. There are 3 levels : none, normal and advanced. The normal and advanced modes reflect what’s happening when toggling “Advanced Properties” in the object inspector. If you want to apply the same verbosity level on every node, it’s possible using the “Cycle Verbosity” button in the toolbar.
The node editor also supports drag and drop for edges between sources, and toggling visibility of an output port using Shift-Click. A full description of all the interaction supported by the node editor is available in the README file of the corresponding plugin (see next section How to test ParaView node editor).

How to test ParaView node editor
The node editor has yet to make its way in the releases of ParaView, and should be available from ParaView 5.11 release onward. In the meantime it is possible to test it right away using one of these two methods :
- downloading a nightly build: go to https://www.paraview.org/download/ , select Version: nightly and download ParaView. Then on startup go to Menu – Tools – Manage Plugins and enable the node editor.
- building ParaView yourself: if you are building ParaView yourself from master, it is possible to enable the node editor plugin using the CMake variable
PARAVIEW_PLUGIN_ENABLE_NodeEditor=ON.
The code source itself lives in the ParaView sources, in the ParaView/Plugins/NodeEditor folder. You will have access to the code and the README.md that lists all the features of the plugin and links to related issues.
What is left to do
While the node editor is working great in most cases, there is still room for improvements :
- While editing sources and views properties is currently possible in the node editor, it does not offer access to the display properties yet.
- Graph cycles are possible even though they are not supported by ParaView.
- Huge pipeline with node verbosity level set to advanced leads to a slow down when interacting with the node editor.
Acknowledgment
Thanks to Jonas Lukasczyk who first designed and implemented this node editor at https://github.com/JonasLukasczyk/paraview-node-editor.
Thanks to TotalEnergies for their support in the integration of the node editor in ParaView.