Preview mode in ParaView
Saving out rendered results as images or animations is a common step in a typical ParaView visualization workflow. Often one sets up a scene and then uses the Save Screenshot or Save Animation menu options from the File menu to generate these results. In most cases, the generated images match what you are seeing on the screen. If you change the image resolution, however, you can end up with surprising side effects.
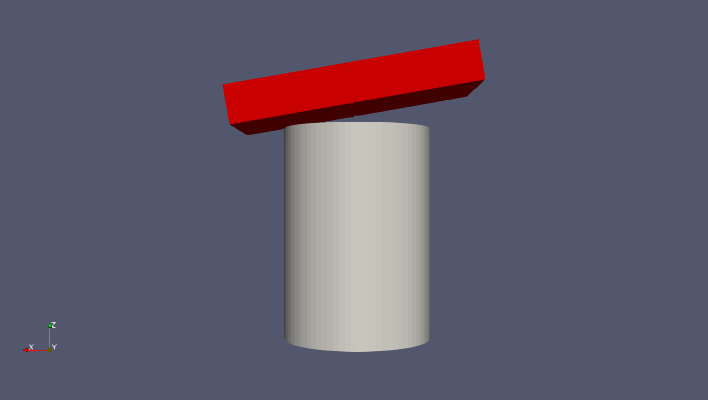
For an example, here is a simple visualization setup and then the images saved out with various target aspect ratios: 16×9, 9×16, and 1×1.
|
|
||
|
|
|
|
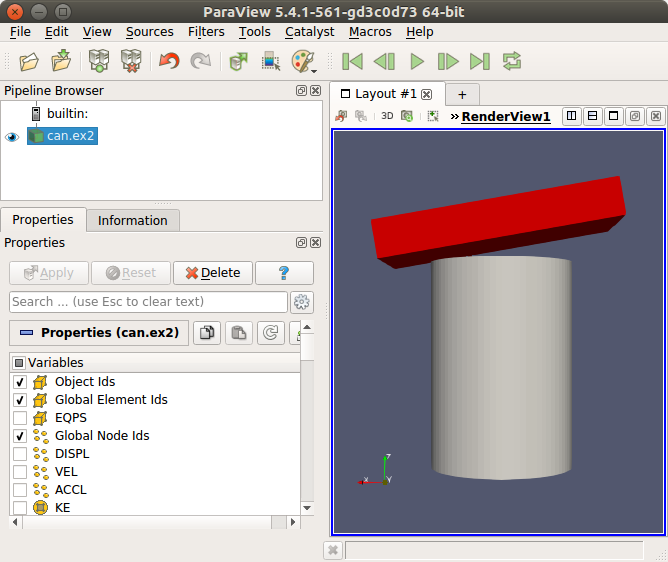
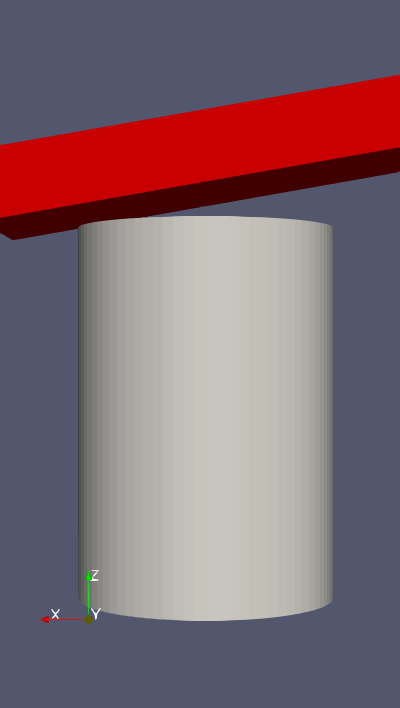
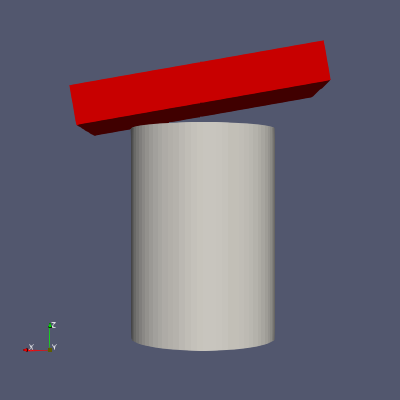
As you can see, depending on how closely the target aspect ratio matches the current aspect ratio, the results can be quite different from what you see on the screen.
In our quest to make is easier to generate publication quality results from ParaView, we have added a new Preview mode. Preview mode is similar to vein to the Print Preview mode offered by many tools, including your browser.
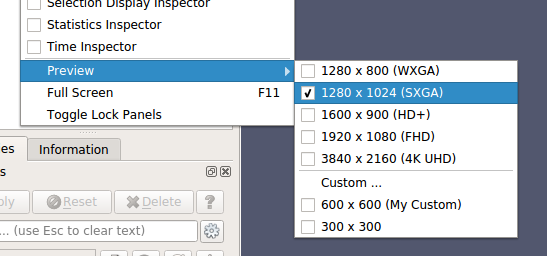
You enter the Preview mode, by selecting an option in the View | Preview sub-menu. You can pick one of the predefined resolutions are add your own.
The menu always reflects the state of the current layout tab. To exit the Preview, you use the same menu and simply un-check an already checked item.
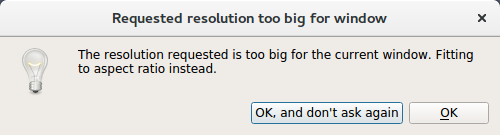
When you enter Preview mode, the active layout will be resized to match the target resolution. If the target resolution is larger than the space available for the layout tab on your screen, then it will match the target aspect ratio and show a warning dialog as follows.
That’s pretty much it! Now you can go about setting your scene up — moving the camera around, etc. If you have multiple views in the current layout, you can interact with the splitter to adjust the relative sizes of the individual views, if needed. Preview mode does restrict some other operations, however. For example, you can’t close views or create new views. Hence it is only intended to be used for final adjustments before saving our the images or animations.
If you trigger Save Screenshot or Save Animation while in Preview mode, then the dialog will pick the preview resolution by default as the target image resolution. Furthermore, changing parameters like Separator Width or Separator Color in this dialog, will be immediately reflected in the preview. (Our plan is to make other options such as Color Palette, Stereo Mode to be reflected in the preview mode as well, but that will come later).
And as always, the mechanism is available in Python API as well. You can use the Python trace to trace out entering and exiting Preview mode.
from paraview.simple import *

# get layout
layout1 = GetLayout()

#Enter preview mode
layout1.PreviewMode = [1280, 800]

#Exit preview mode
layout1.PreviewMode = [0, 0]
Acknowledgement
The work was funded by Sandia National Laboratories. For design discussion that led to this implementation, please see the feature request here.
Sandia National Laboratories is a multimission laboratory managed and operated by National Technology and Engineering Solutions of Sandia, LLC., a wholly owned subsidiary of Honeywell International, Inc., for the U.S. Department of Energy’s National Nuclear Security Administration under contract DE-NA0003525.