Introduction to ParaView Catalyst Live

ParaView Catalyst is a library that adds ParaView analysis and visualization capabilities to a simulation program. For each time step, the simulation code generates data which is passed (using Catalyst’s API) to a ParaView pipeline. This pipeline generates images or processed data that can be saved to disk.
Furthermore, data can be exchanged with a remote ParaView server enabling easy inspection of simulation status and modification of analysis and visualization parameters. We call this connection ParaView Catalyst Live.
The goal of this post is to enable you to try out Catalyst Live and introduce its main features. First, we invite you to watch a video which introduces the example presented next.
Introduction to Paraview Catalyst Live from Kitware on Vimeo.
To be able to run the example presented, you need to download a repository version of ParaView, configure it with PARAVIEW_ENABLE_CATALYST and PARAVIEW_ENABLE_PYTHON and compile it (see the ParaView Build and Install Wiki for more information). Optionally, you can also enable PARAVIEW_USE_MPI if you want to run coprocessing or ParaView in parallel.
You also need two scripts: driver.py and coprocessing-pipeline.py which are attached to this blog post. driver.py plays the role of a simulation process which generates at each time step a wavelet with a different parameters (see ParaView’s Sources/Wavelet menu). coprocessing-pipeline.py processes this data by running a contour filter, saving both the wavelet and the contour as data files, saving an image showing the contour and enabling Catalyst Live communication. This second script was generated using the Catalyst Script Generator Plugin (for ParaView 4.1 and earlier it was called the CoProcessing Script Generator Plugin).
With these, you are ready to try out Catalyst Live. Note that all commands shown are relative to ParaView’s build directory. First download the two scripts in a directory (assume it is called Catalyst-test) and start the driver and the coprocessing pipeline:
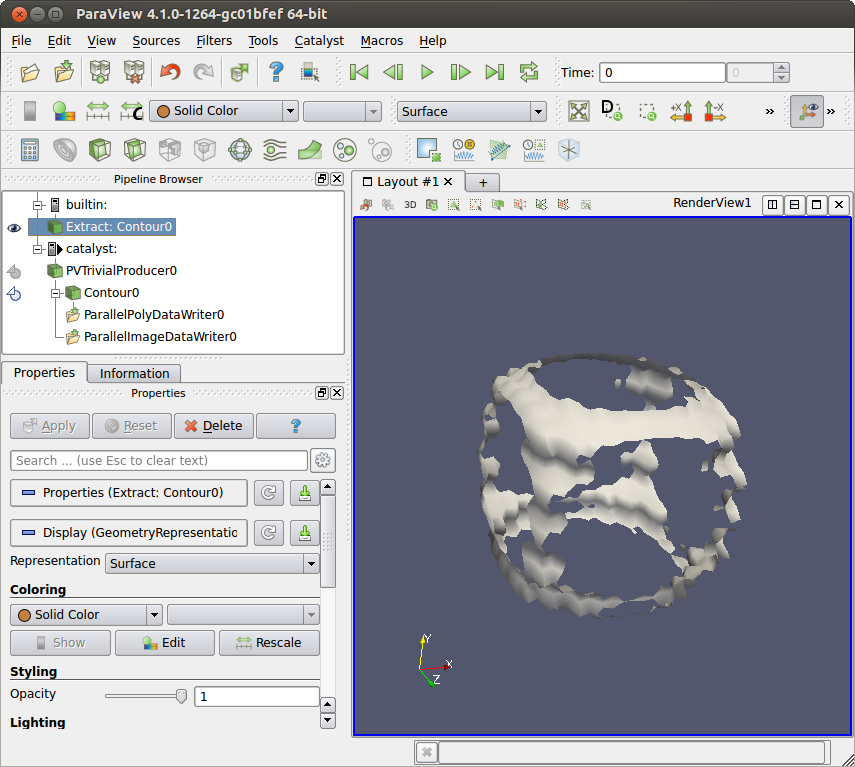
Here we run the driver for 1,000 time steps and we pass the coprocessing pipeline script as a parameter. Then, start ParaView and connect to Catallyst using Catalyst > Connect menu. The Pipeline Browser displays two servers, the builtin server and the catalyst server. Note that next to the catalyst server there is a ‘play’ icon showing that the simulation is running.
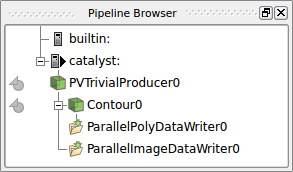
The two grayed out icons next to PVTrivialProducer0 and Contour0 allow you to extract data from Catalyst, transfer it, and visualize it on Catalyst Live. Care must be exercised when clicking on the extract icons as data you request to be transfered may be very big (for real simulations). When you click on the extract icon next the the Contour0 data is added as a source to the builtin server. This data can be visualized by clicking on the eye icon next to it.
A user can do the following operations:
- Modify any visualization pipeline or writer parameters. Note that pipeline elements cannot be added or removed in the current version and we provide only generic writer parameters such as file name and writing frequency.
- Pause a simulation using Catalyst > Pause Simulation and continue it using Catalyst > Continue. If a simulation is paused, a ‘pause’ icon will be displayed next to the catalyst server.
- Pause the simulation at a certain time step in the future using Catalyst > Set Breakpoint or remove a previously set breakpoint using Catalyst > Remove Breakpoint. If a breakpoint is set, a red circle is displayed next to the catalyst server.
While a simulation is paused, the user can fully interact with simulation data by changing visualization pipeline parameters.
If you compiled ParaView with PARAVIEW_USE_MPI you can run both Catalyst and Paraview in parallel:
runs the driver and the coprocessing pipeline on 5 processors
runs ParaView server on 2 processors
runs the ParaView client and connects it to the ParaView server you just started. Everything else behaves the same as in the serial run.
With this, we end our introduction to ParaView Catalyst Live and invite you to try it out. It is part of the ParaView 4.2 release.
Update 2017/11/03
The files in the post are now used for testing and are available in the ParaView source code. Search the source code for the driver CatalystWaveletDriver.py and the coprocessing pipeline CatalystWaveletCoprocessing.py. You can use these files as described in the post or you can run the associated ParaView tests: ctest -R CatalystLive. Make sure you compile ParaView with BUILD_TESTING, PARAVIEW_USE_MPI and PARAVIEW_ENABLE_PYTHON.
This is very important work especially as data sizes get out of control, nice!
Great post! I’m looking for the attached files driver.py and coprocessing-pipeline.py, How can I access those files please?
Hi Lily, I added a note to the blog pointing to the new location of the files (the ParaView source). Note you can can try out this functionality by executing the CatalystLive ParaView tests.
Hi Dan,
I built Paraview v5.4 and I still could not find the CatalystWaveletCoprocessing.py CatalystWaveletDriver.py files, can you please point me to directory. And when I run “ctest -R CatalystLive”, Paraview opens and connect but then it crashes and displays:
Start 1781: pv.CatalystLiveSetBreakpoint
1/4 Test #1781: pv.CatalystLiveSetBreakpoint …..***Failed 11.95 sec
Start 1782: pvcs.CatalystLiveSetBreakpoint
Lily,
The python files are in
./Applications/ParaView/Testing/XML. See the actual command for the test withctest -N -V -R CatalystLiveSetBreakpointand then run the command to see additional messages.Hello
Is it possible to change simulation model parameters during live simulation, e.g. with a 2D slider widget (like this: https://lorensen.github.io/VTKExamples/site/Cxx/Widgets/Slider2D/) in paraview?
Hi Moritz,
I believe that some people have done this with custom changes to ParaView but they were more of a prototype than a robust, general solution. The Catalyst Live functionality should see some significant upgrades in the next couple of years but as of now I don’t have a specific timeline or list of functionalities. As funding comes through to work on this though I’m sure there will be blog posts about these improvements.
Hi Andy,
thanks for your reply.
Which approach would you suggest if I would implement this on my own?
Looking at the Plugins or CustomApplications on the the Example subdirectory or the plugins in the Plugins subdirectory would be a decent place to start.
Can I still run this test using a Paraview installed from packages downloaded from the official website (.dmg on Mac or .exe on Windows) instead of a repository version of ParaView?