Make Any Screen 3D: Real-Time View Tracking In ParaView With Python And OpenCV

ParaView comes packed with a wide range of tools directly out of the box which are more than enough for many applications. Nevertheless, sometimes you want to add some functionality to scratch a specific itch that no existing built-in tool does in the way that you want. Of course, there is always the option to open up the ParaView source code and start tweaking and adding C++ code but this may be daunting at first if you are new to ParaView and VTK, or just don’t want to deal with compiling code. An often simpler solution is to leverage ParaView’s extensive support for Python.
ParaView provides two main ways of using Python, namely processing data in programmable filters and automating ParaView workflows via stand-alone scripts and the embedded Python shell. The former can be used to quickly test custom algorithms while the latter can be used to fully automate anything that can you can do via the ParaView graphical interface. Both allow the user to integrate third-party libraries with Python bindings, which creates many interesting possibilities.
Reproducing The 3D Depth Illusion
One of these possibilities is to easily re-implement the 3D depth illusion shown below (source). This illusion received a lot of attention when it was implemented on a smart phone last year. The same effect is nevertheless possible on any “dumb” screen with just a webcam and and OpenCV.

Face-Tracking In ParaView With OpenCV
OpenCV is a well-known C/C++ library with Python bindings widely used in real-time computer vision. With its extensive range of functionality, it has essentially become the Swiss army knife of the field. The following video shows how OpenCV’s facial recognition can be used to create an immersive 3D effect in ParaView. The effect is enhanced by the monocular camera view but even with two eyes on the screen it still gives an increased sense of depth.
The effect is achieved by tracking the user’s face with a webcam and OpenCV. The relative position of the face in the image is then used to determine the angle at which the scene should be shown and the scene’s camera position is updated accordingly. The result is that the scene appears to physically “float” in the middle of the screen.
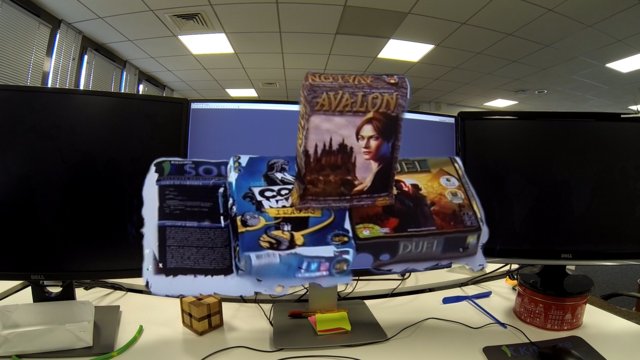
The examples in the demo show that this effect works at very different scales for the large range of datasets that ParaView typically handles. Specifically, the datasets in the video are
- Simple geometric shape.
- Board games reconstructed from smartphone videos.
- A map reconstructed from LiDAR with VeloView.
- Anatomical data showing a head and cranium.
- A caffeine molecule loaded from a PDB file.
The Code
Just like ParaView, the face-tracking code is open-source and available on GitLab. Note that it is currently just a quick proof-of-principle demonstration with plenty of room for improvement. Feel free to test it out with other examples but don’t expect it to be robust enough yet for all situations.
Setting up face-tracking is relatively straightforward with the code, which consists of 2 main components. One component is a simple script that runs in a terminal and connects to a webcam. The other component is a Python module that is imported within ParaView’s Python shell. A single object is then created to continuously update the scene’s active camera and refresh the view. The code will then run in the background once launched until the user stops it. Launching the camera adjuster requires just 4 short lines of Python code in the shell:
import adjust_camera
cam = GetActiveCamera()
ca = adjust_camera.CameraAdjuster(cam, Render)
ca.start()
The README in the source repository provides detailed instructions of how to set up the face-tracking in ParaView. There is also a convenient Bash script that can automatically launch ParaView with the webcam manager in the background. The script will ensure that the associated Python modules are found by ParaView. It will also print out a single command on the terminal that the user can copy-paste into the Python Shell. This command will set up the camera adjuster as above and print out instructions directly in the shell.
This looks very interesting, but I’m having a problem with getting python modules available from within Paraview’s python interpreter.
I can install opencv (pip install opencv-python) into my local copy of python, but the interpreter from paraview uses it’s own pvpython interpreter, and doesn’t use the same library paths as the system interpreter, so it doen’t see the new modules. If I manually copy them over, the script segfaults when I import cv2.
I also think your code is using python 3 “from importlib import reload” is a python 3 requirement. How do I get paraview (5.5.2 or 5.6.0) to use python 3?
Hi Euan,
Thanks for the feedback. The README has been updated with some notes about the Python version and using virtual environments. The current code is indeed using Python 3, which will be the default version for all releases after ParaView 5.6.0. Several distributions already provide ParaView with Python 3 support, if that is an option for you. Otherwise, the simplest solution may be to rebuild ParaView with Python 3 (see the updated README for instructions).
If you are not able to obtain a version of ParaView with Python 3 support, it may be possible to adapt the current code to work with Python 2. The segfault that you mentioned is likely due to the shebang at the top of the webcam_server.py file, which explicitly points to Python 3. Changing this allows the webcam server to run with Python 2. At least 2 other simple changes will be required in other files. See the README for details. Other less trivial changes may also be necessary. Unfortunately, I do not have the time to explore this at the moment. If you identify other necessary changes for Python 2 support, please submit a merge request or file a report on the project’s GitLab page.
Dependencies installed in virtual environments with pip should work, but you will likely need to update the PYTHONPATH environment variable. This should include the path to the “site-packages” directory where pip installed the dependencies. Of course, the virtual environment will need to use a compatible version of Python.
Thanks for the update Mike. Unfortunately, I’m still struggling with this.
The pre-built binaries available at https://www.paraview.org/download/ are all still based on Python 2.7. Even the nightly build of 5.6.1. is based on Python 2.7.
Fedora’s own packaged build is now at 5.6.0, and uses Python 3.7.3, however I still get a segfault as soon as I import the adjust_camera module :-(.
UPDATE: It’s actually caused by the “import cv2” line.
I am using opencv-python==4.1.0.25
If I run pvpython, and call “import cv2” it works fine.
I have opencv-python installed both under a venv, and also as part of the main global python3 libraries, and it works in both cases.
It crashes in both cases from within paraview.
It seems strange to me that the import works in pvpython but not ParaView’s Python shell. I’ve discussed the issue with one of the ParaView devs but the only advice for the moment is to try rebuilding ParaView on your machine. I will follow up if I find a better solution but for now that’s all I’ve got. Sorry.
For reference, I’m using ParaView 5.6.0, OpenCV 4.1.0 and Python 3.7.3.
Hello, What could cause this error?
Traceback (most recent call last):
File “”, line 1, in
File “”, line 12, in
NameError: name ‘GetActiveCamera’ is not defined